How To Fix Scratches On Wood Floor? What Are The Best Methods To Clean Wood Floor?
Scratches on wood floor
Scratches are a common defect of both unfinished and finished hardwood floors, depending upon original construction or finishing process. Scratches occur when one object passes over another with enough force to indent the top piece of material.
For example, if someone dragged something very heavy across your floor, it may have left behind some scratches that mark the surface of your beautiful stained hardwood floors. You can fix these scratches yourself by sanding out the notched areas of the surface, then refinishing with stain and varnish combination.
Types of scratches
There are different types of scratches on wooden floors, and it is important to determine the type in order to figure out how to fix them.
Deep scratches:
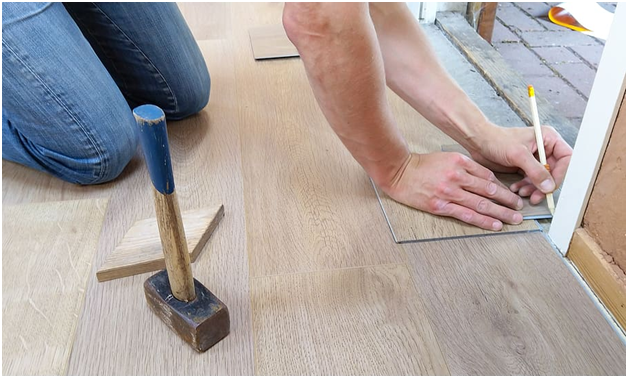
These look like grooves or tunnels that go into the wood and cannot be filled with a simple polish (and sometimes not even by sanding). They can be banged out with a mallet but this can damage the floor also. The only solution for deep scratches is to strip off all the old finish and stain, re-sand and refinish.
Swirl marks:
These are round rings pressed into the surface by heavy objects such as rolling furniture, other hard objects dragged across it etc. This kind scratch can be fixed by applying a metal polish (such as “Brasso”) with a soft cloth. If the scratch goes all the way through to the wood, sand very lightly (with 220 grit sandpaper) back and forth gently until you make your way down to the bare wood.
Scratches that go into the wood:
These are fixed by applying metal polish or even just toothpaste, then sanding out with 320-grit sand paper. Sand only enough to remove stain deep enough for fresh finish to cover it up. Only use water when sanding delicate woods such as oak, don’t use oil based products on them. Use only oil-based floor finishing products on other types of hardwood floors because they seal in moisture which is exactly what they want.
Using sand paper
First you have to sand down the surface of the scratch with medium-grit sandpaper until it’s no longer raised off the surface of the flooring. The deeper the scratch, the more material you will need to remove so that you can flatten out its surface again to be flush with all other parts of your flooring. Once it’s sanded down, the difference between what is left and the surrounding area should be noticeable.
Once you let the glue sit for 30 minutes, grab your toothpicks and start applying them into that same scratch using as many as needed until they fit snugly into place inside it (without falling back out once you let go). You can use up to 500 toothpicks or before the glue starts to dry.
Once you have applied all of your toothpicks, take a damp rag and wipe off any excess dried glue that seeped out of the crack between the wood pieces. Let it dry overnight. Once it has dried completely, you can start sanding down the area with medium-grit sandpaper again until all visible parts of your toothpicks are gone and only the scratch remains in its original condition.
Read More: Who is Ryan Garcia? Ryan Garcia’s Age, Career, Early Life, And More
Using linseed oil
You can fix scratches on wood floors many different ways. For very small surface scratches, consider using linseed oil to make the scratch less noticeable. However, you’ll want to avoid water-based products like varnish or shellac for this task, as they may cause dark spots in your wood flooring. If you’d like the best results possible the first time around, you might consider taking your project to a professional who can apply polyurethane varnish to cover up any blemishes on your floor.
Use water
Some wood surfaces, like Lackluster wood, have more visibility of scratches and worn areas, so in order to clear them, one can use the soft mop and vacuum (with the appropriate attachment) to remove dust and debris. Any water-based product mixed with a biodegradable cleaning agent can be the best combination for cleaning. For cleaning, one can apply two to four drops of liquid soap with water in a regular spray bottle, mist the floor, and then distribute the solution with a particular fiber mop. Some non-toxic wood cleaners are also available commercially. In most cases, the traditional practice of soaking a wood floor with water damages the wood’s shine and causes it to be worn out.
Start by removing any scuff marks or stains on your wood flooring. You can do this with warm water and a clean rag. Dab the area, then follow up immediately after with a moisturizing lotion to help keep your wood floors in tip-top shape for longer.
Apply cleaner
Then, you’ll want to apply some all-purpose wood cleaner to the entire area that has been scratched or damaged in order to get it nice and clean before beginning the waxing process. Those with wood floors will agree that it’s best not to skip this step because of how critical it is.
Apply beeswax
After applying some beeswax and letting it dry, buff out any excess wax with a soft cloth. Be sure to pay close attention to how much wax you’re using, as it will be difficult to take back once it has been applied. You can also try mixing lemon oil into your beeswax for added moisturizing properties that are great for wood floors.
After letting the first coat dry, apply another layer of wax and let it sit overnight so it can properly dry before doing anything else with your scratched flooring. If the scratches still seem prominent at this point, you may want to consider applying one final coat of wax after this second waiting period has passed. This last step might sound like overkill to some people but if you want an end-product that looks polished and professional then there’s no harm in being extra careful in your approach.
Use polish or furniture wax
The last thing you might want to do is go back over the entire project with a furniture wax or plastic polish. Your wood floors will certainly look even better after doing so, provided that you’d like them to get their best results possible for the longest amount of time possible.
A few things to keep in mind when repairing deep scratches:
- Sanding is necessary when working with wood floors because what allows you to see the difference between the scratch and its surrounding area. If you use a little too much toothpick, it will create another problem: More surface area to sand down which means more time wasted.
- Whatever type of wood is your flooring made of, make sure you choose glue that’s compatible with it.
- Toothpicks often leave behind very small, fine fibers (that you can’t even see) as they break apart during the repair process. Make sure to vacuum and sweep thoroughly after every step.
- If dust particles remain on your floor afterwards, those areas may end up getting darker than the rest once they’re stained and/or sealed over with polyurethane.
Can scratched wood floors be repaired?
Scratched wood floors can be repaired, depending on the severity of the scratches. Minor scratches can be easily fixed with a simple touch-up kit, while deep scratches may require the assistance of a professional. The first step in repairing a scratched wood floor is to assess the extent of the damage. Once you have determined the severity of the scratches, you can decide whether to undertake the repair yourself or hire a professional.
For minor scratches, you can use a touch-up kit that includes a marker or crayon that matches the color of your floor. Apply the marker or crayon to the scratch, and then gently buff the area with a soft cloth. This will help blend the color of the marker or crayon with the rest of the floor, making the scratch less noticeable.
For deeper scratches, it may be necessary to use wood filler to repair the damaged area. Wood filler is a putty-like substance that can be applied to the scratch and sanded down to match the surrounding area. This process can be time-consuming, but it is a relatively easy and inexpensive way to restore the look of your scratched wood floor.
If you are unsure about repairing your scratched wood floor, it may be best to consult a professional. A flooring specialist can assess the damage and recommend the best action. They may also have access to specialized tools and materials that can help repair your floor more effectively. Whatever approach you choose, take your time and follow the instructions carefully to ensure a successful repair.
Conclusion
Wood floors are well-known for being able to last a lifetime if you take care of them properly, but that comes down to the type of wood you’re working with when it comes time to refinishing or touching up existing flooring. You’ll notice immediately when something has gone wrong once the varnish begins bubbling or peeling away in any areas where it’s been applied this is typically an indication that the oil layer underneath is not compatible with what you’ve done on top of it. Fortunately, there are remedies for this problem as well, including using some white vinegar instead of linseed oil when repairing small scratches and scars on your wood flooring.
Frequently Asked Questions
Actually it is not very difficult. You just simply try different method according to your scratch.
Yes, you can remove or fix all type of scratch by using different techniques and methods.